E3 - Equipment Energy Efficiency
Help Section - Applicant Management
Last updated 10 October 2018
Manage Your Applicant's Brands
The following page will show you how to manage your Applicant’s brands in the registration system.
This includes how to add, edit or delete a brand.
Each Applicant must create a list of brands that can be selected when completing an application to register a product. This list of brands is managed at the Applicant level so that you can update brand information (such as websites) at a later date.
You need to have at least one brand set up for your Applicant before you can submit an application to register a product.
Watch our video walkthrough to see how to manage your brands.
Alternatively, you can follow the detailed instructions outlined below:
Add a brand
To add a brand to your Applicant:
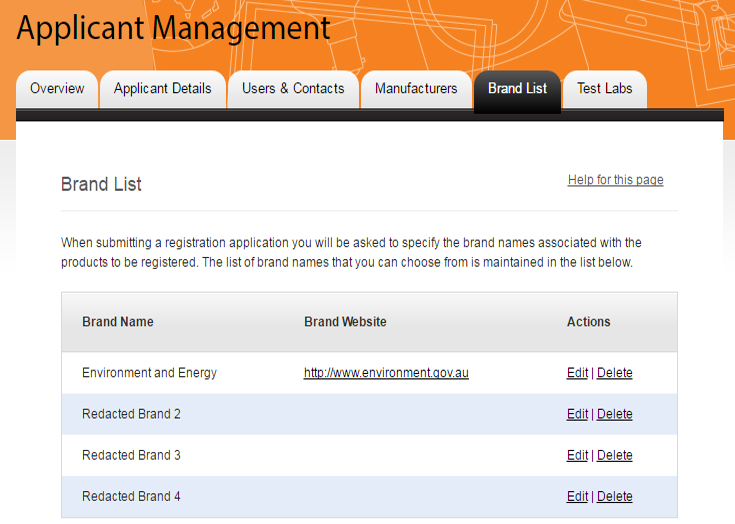
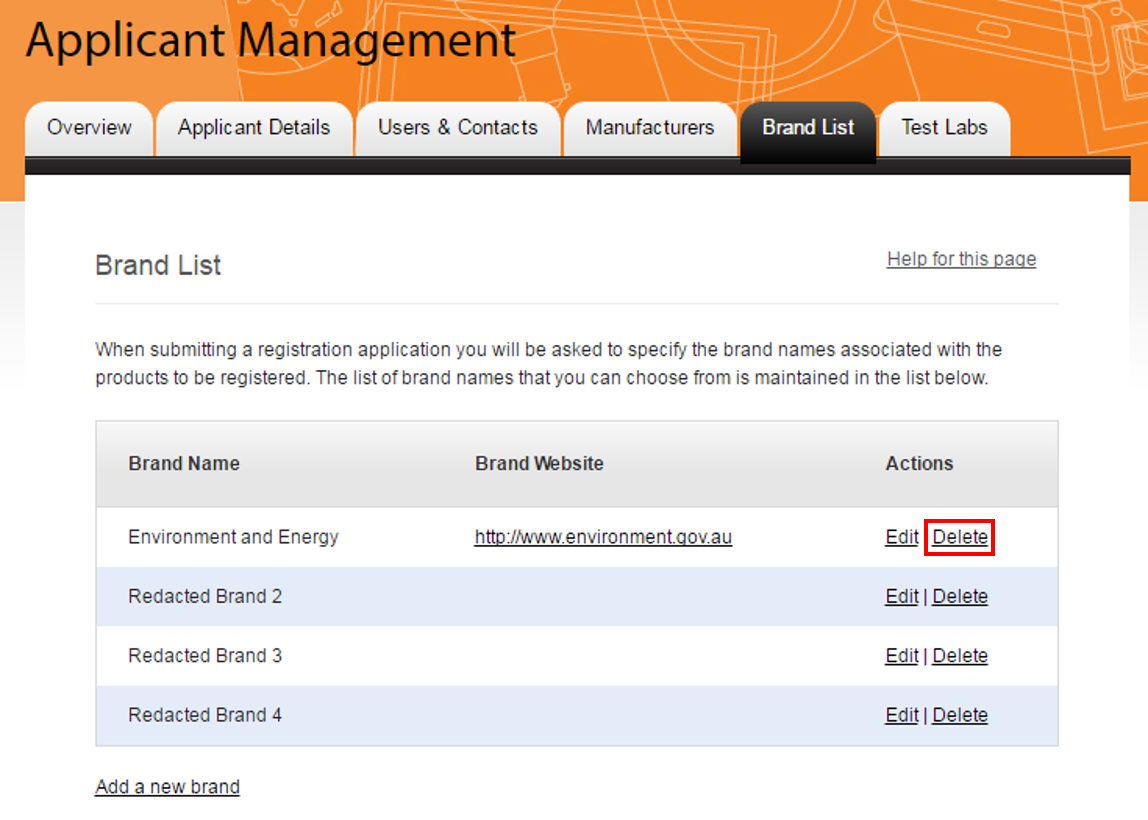
- From the Applicant Management menu, select the “Brand List” tab. The Brand List page displays. See Figure 1 below:
Figure 1: Applicant Management Brand list page
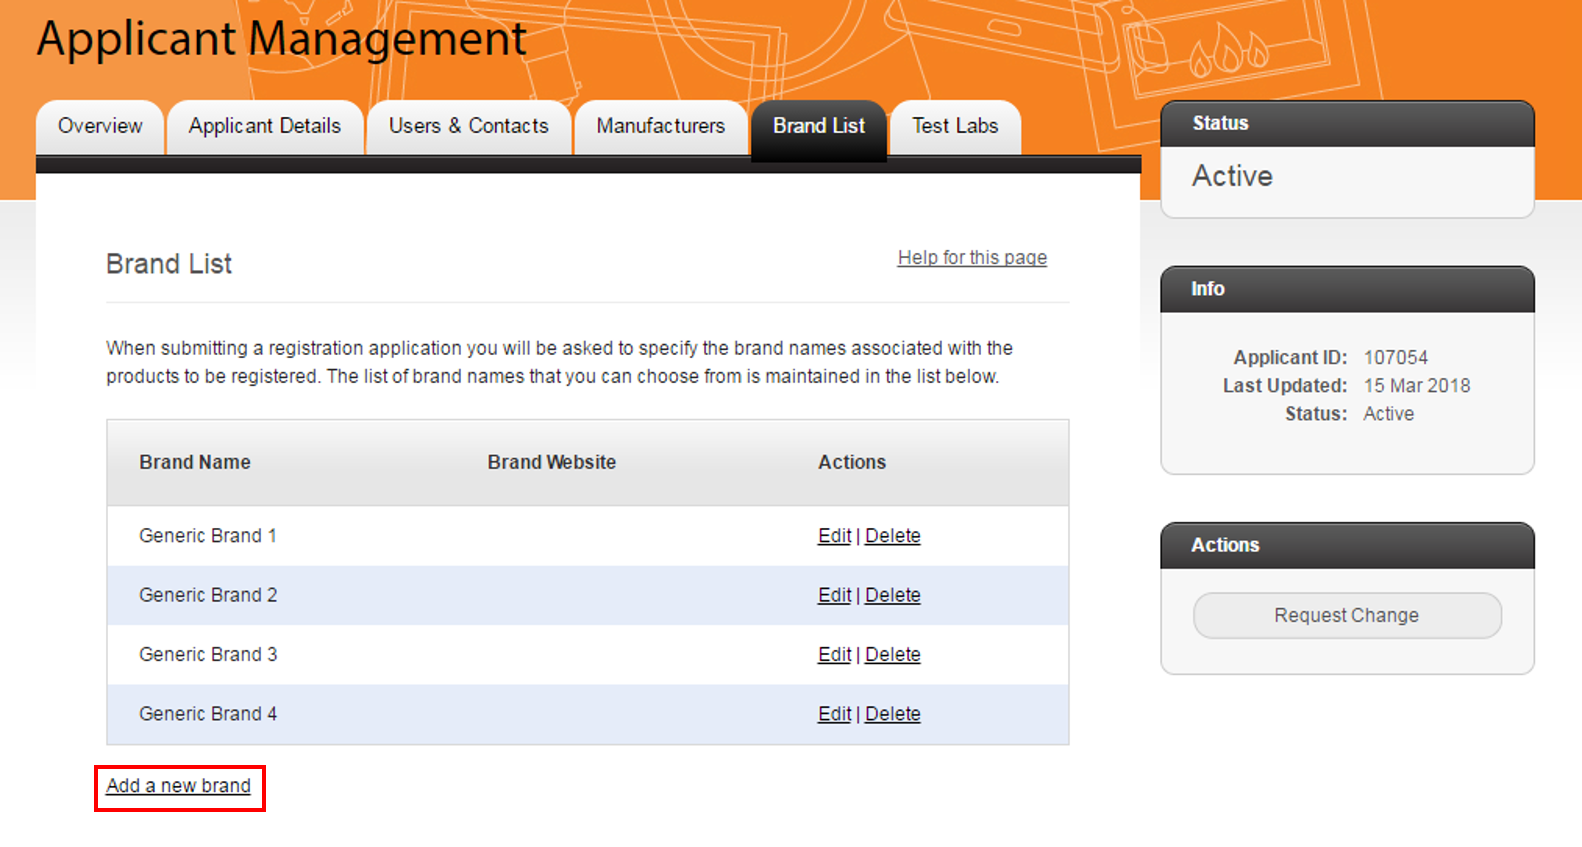
- Select the "Add a new brand" link. The Create Brand page displays. See Figure 2 below.
Figure 2: Create Brand page
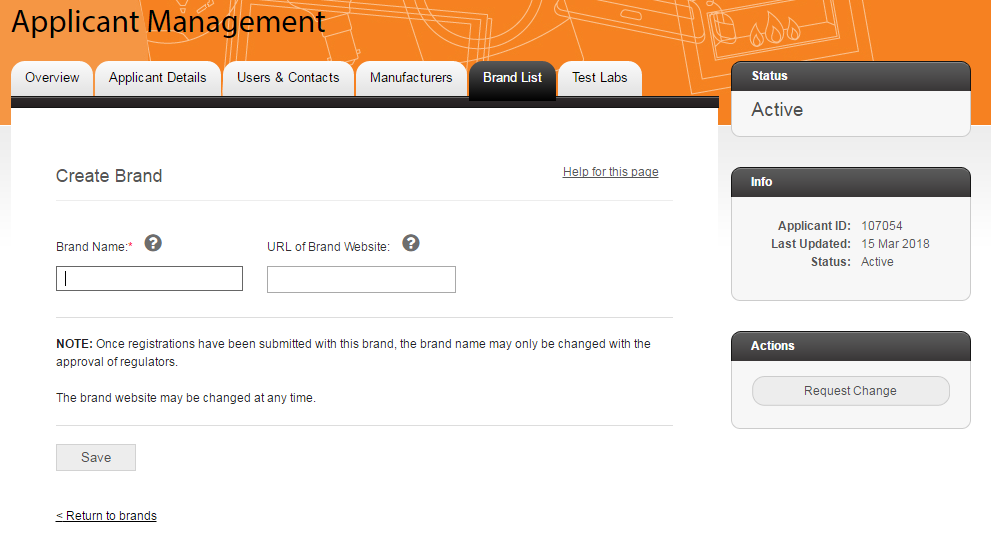
- In the “Brand Name” field, enter the brand name.
- In the “URL of Brand Website” field, enter the brand’s website URL (e.g. http://www.mysite.com). When the brand is displayed on the Public Registration Database, this will be a link to the brand website.
- Select the “Save” button. The brand is created.
Note: External power supplies and set top boxes allow for the registration of multiple brands. These may also be entered under the Models & Manufacturer step. All other product types may only register a single brand.
Edit a brand
To edit a brand:
- Select the “Edit” link next to the brand you want to edit. See Figure 3 below.
Figure 3: Edit a brand
- On the “Update Brand” page, make the changes you require.
If you have not yet submitted any applications under this brand, you can edit the brand name.
If you have, and the brand name appears greyed out as shown in Figure 4 below, then the brand name can only be updated with regulator approval. This means you will need to submit a Change Request – see below for more information on how to do this.
You can edit the brand website at any time.
Figure 4: Update Brand page
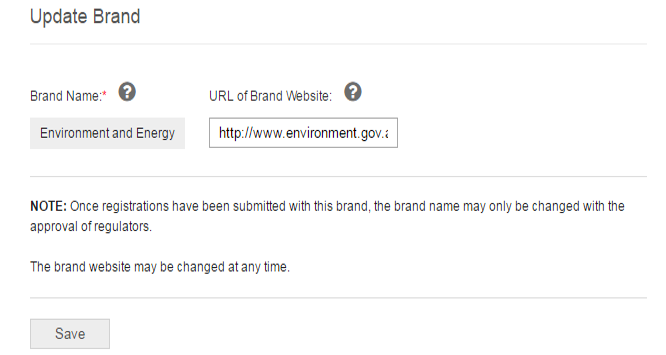
- Once you’ve made your changes, select the “Save” button at the bottom of the page to save your changes.
To submit a change request:
- Select the “Request Change” button in the Actions box on the right hand side of the page. See Figure 5 below.
Figure 5: Request Change button

- A pop-up window appears, as shown in Figure 6 below.
Figure 6: Request Change pop-up
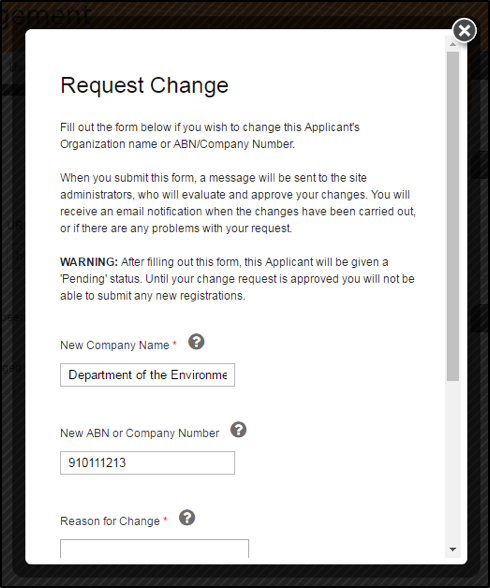
- In the New Company Name field, enter the name of your company as it currently appears on the system (unless you’d also like to update your company name).
- In the New ABN or Company Number field, enter your company’s ABN or company number, if your company is based in Australia (unless you’d also like to update your ABN or company number).. If it is based elsewhere, you can leave this field blank.
- In the Reason for Change field, enter the reason for the change and the brand name you wish to change to.
- Select the “Submit Change Request” button at the bottom of the page.
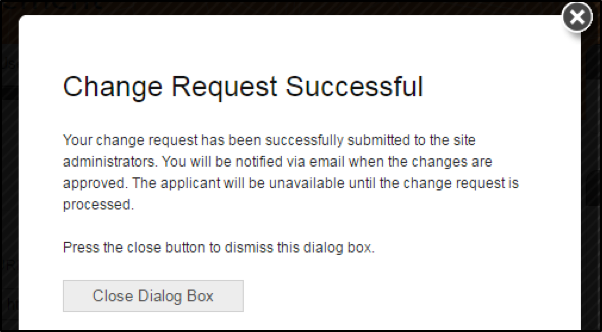
- The pop-up refreshes and a new message appears confirming that the change request has been successfully submitted to the Energy Rating Team. See Figure 7 below.
Select “Close Dialog Box” to close the window.
Figure 7: Request Change pop-up
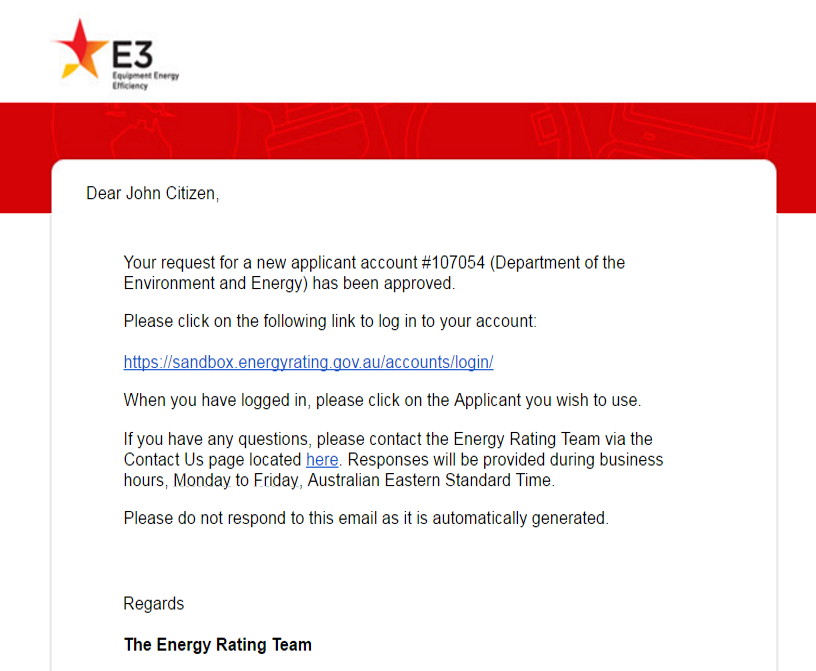
- Once the Energy Rating Team approves the change request, you will receive an email confirmation confirming that it has been approved. See Figure 8 below.
Figure 8: Change request approval confirmation email
Delete a brand
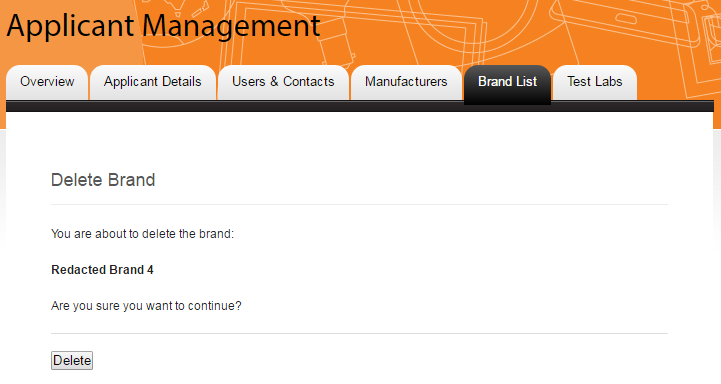
To delete a brand:
- Select the “Delete” link next to the brand you want to delete. See Figure 9 below.
Figure 9: Delete a brand
-
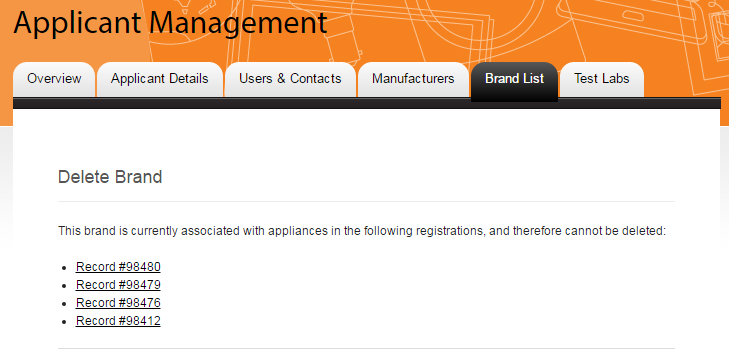
You will then see one of two pages.
- If the brand you want to delete is still associated with registrations, you will see the page as shown in Figure 10, which contains a list of registrations that the brand is linked to. As a result, the brand cannot be deleted.
Figure 10: Delete Brand – Linked Registrations
- If the brand is not associated with any registrations, you are
asked to confirm if you want to continue with deleting the
brand. See Figure 11 below.
Select the “Delete” button to confirm and delete the brand. Your brand is now deleted.
Figure 11: Delete Brand – Linked Registrations